智能充电器设计

1.无需注册登录,支付后按照提示操作即可获取该资料.
2.资料以网页介绍的为准,下载后不会有水印.资料仅供学习参考之用.
密 惠 保
智能充电器设计(论文13600字)
摘 要
聚合物锂电池依靠其产品能量密度高和质量轻的特点,而被轻便可携带的设备广泛使用。聚合物锂电池是二十一世纪最能解决移动设备电源难题的最佳电源方案。由于锂电池在不同充电阶段的充电特性不同,所以需要采用不同的充电方式。本设计是基于单片机和智能充电芯片的充电器,它的主要功能是实现电量显示,充电状态提示,电池充满自动断电并自动报警,并且能根据电池电压改变充电方式。在软件上选用简洁易懂的C语言作为设计语言,能高效单片机的功能。所以该设计的目的是为了实现对锂电池智能快速的充电并且不会减少电池寿命,发挥系统的高效性和易用性。并且通过努力,在一系列的调试分析下已经基本可以实现系统的功能。
关键词:智能充电器 单片机 锂电池
Design of Intelligent Charge
Abstract
Lithium polymer batteries rely on their products of high energy density and light quality characteristics, and is widely used in portable devices. Lithium polymer battery is the best solution to solve the problem of power supply of mobile devices in twenty-first Century. Because the charging characteristics of lithium battery in different charging stage is different, so it is necessary to use different charging methods. The design is based on SCM and smart charger charger. Its main function is to achieve power, according to the charging state prompt, the battery is full automatic power-off alarm and automatically, and can according to the battery voltage to change charging methods. In the software, the use of simple and easy to understand the C language as a design language, the function can be efficient SCM. So the purpose of this design is to realize the intelligent fast charging of lithium battery and will not reduce the battery life, and play a system of high efficiency and ease of use. And through the efforts, in a series of debugging analysis has been able to achieve the basic functions of the system. [来源:http://www.think58.com]
Keywords:SCM;Intelligent charger;Lithium battery
[来源:http://www.think58.com]


目 录
摘 要 I
Abstract II
第一章 绪论 1
1.1引言 1
1.2 设计目的 3
1.3本文主要完成任务 4
1.4论文结构安排 4
第二章 智能充电器的系统设计 5
2.1系统器件选择 5
2.1.1控制模块选择 5 [资料来源:http://THINK58.com]
2.1.2 充电芯片选择 5
2.1.3显示模块选择 6
2.2系统方案实现 7
第三章 硬件实现及单元电路设计 9
3.1单片机最小系统模块简介 9
3.1.1时钟模块 9
3.1.2复位模块 9
3.2 MAX1898简介 10
3.2.1 MAX1898特性介绍 10
3.2.2 MAX1898芯片介绍 11
3.2.3 MAX1898芯片引脚说明 11
3.3模数转换器TLC1543简介 12
3.3.1 TLC1543特性介绍 12
3.3.2 TLC1543芯片介绍 13
3.4 LCD1602简介 14
3.4.1 LCD1602特性 14
3.4.2 LCD管脚接口说明 14
3.4.3 LCD1602的指令说明 14
3.4.4 LCD1602与单片机的接口电路 15
3.5单元电路设计 16
3.5.1 单片机模块电路和报警电路设计 16
[版权所有:http://think58.com]
3.5.2 电源控制电路设计 16
3.5.3 充电器电路充电控制电路设计 17
3.5.4 充电电量显示电路设计 17
第四章 软件设计 19
4.1 系统流程图 19
4.1.1充电程序设计概述 19
4.1.2单片机主程序流程图 19
4.2电量显示设计概述 21
4.2.1 LCD显示程序流程图 21
4.2.2数模转换流程图 23
4.3本章小结 24
第五章 系统的安装与调试 26
5.1 系统安装 26
5.1.1检查元件的好坏 26
5.1.2放置、焊接各元件 26
5.2单片机最小系统调试 26
5.3 报警系统(即蜂鸣器)调试 26
5.4 电源的检测与调试 27
5.5 发光二极管的检测与调试 27
5.6测试和仿真过程中遇到的问题 27
第六章 总结 28 [资料来源:www.THINK58.com]
参考文献 29
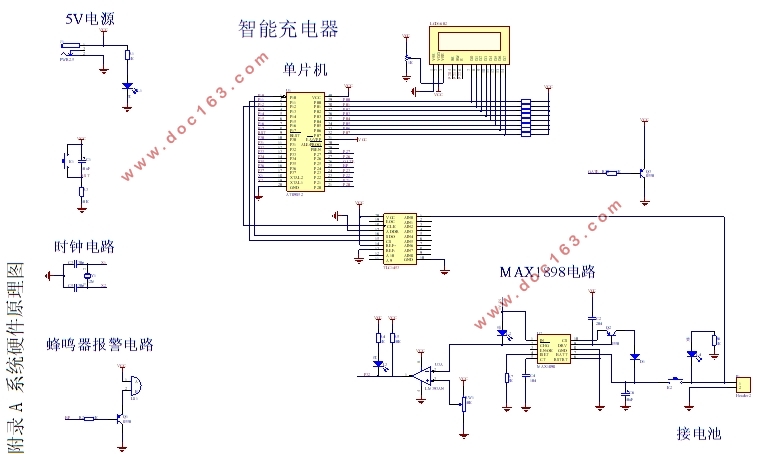
附录A 系统硬件原理图 31
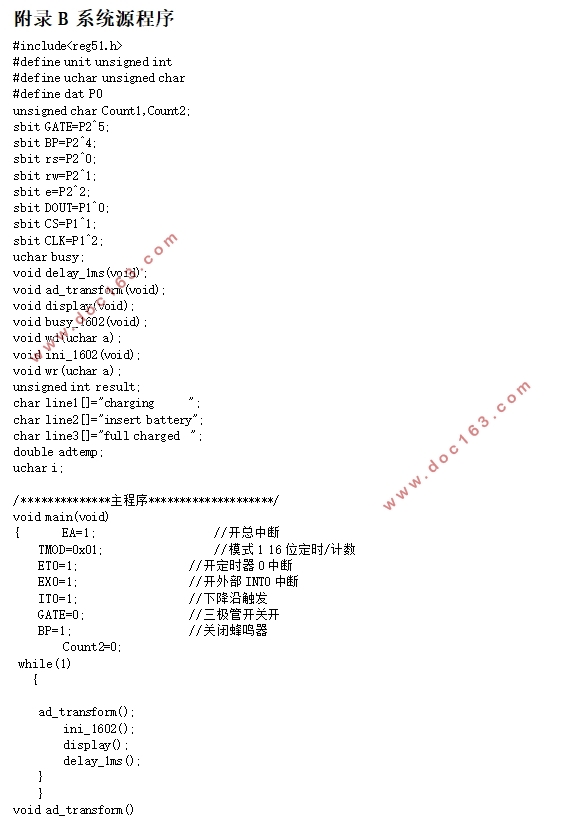
附录B 系统源程序 32 [来源:http://www.think58.com]
